

Today we come here about learning how to creat a blogger account & setup a top level domain from www.reless.biz / www.resellerclub.com / www.kmmh.net to Google's www.blogger.com which is e free site for start bloging. A top level domain helps your site get more & more visitor everyday. You can buy a top level domain from www.reless.biz / www.resellerclub.com / www.kmmh.net. Most of the blogger do not know how to configure a top level domain in www.blogger.com. So now i am gonna show you how to setup a top level domain in Blogger step by step.
STEP - 1 (Creating Blogger Account)
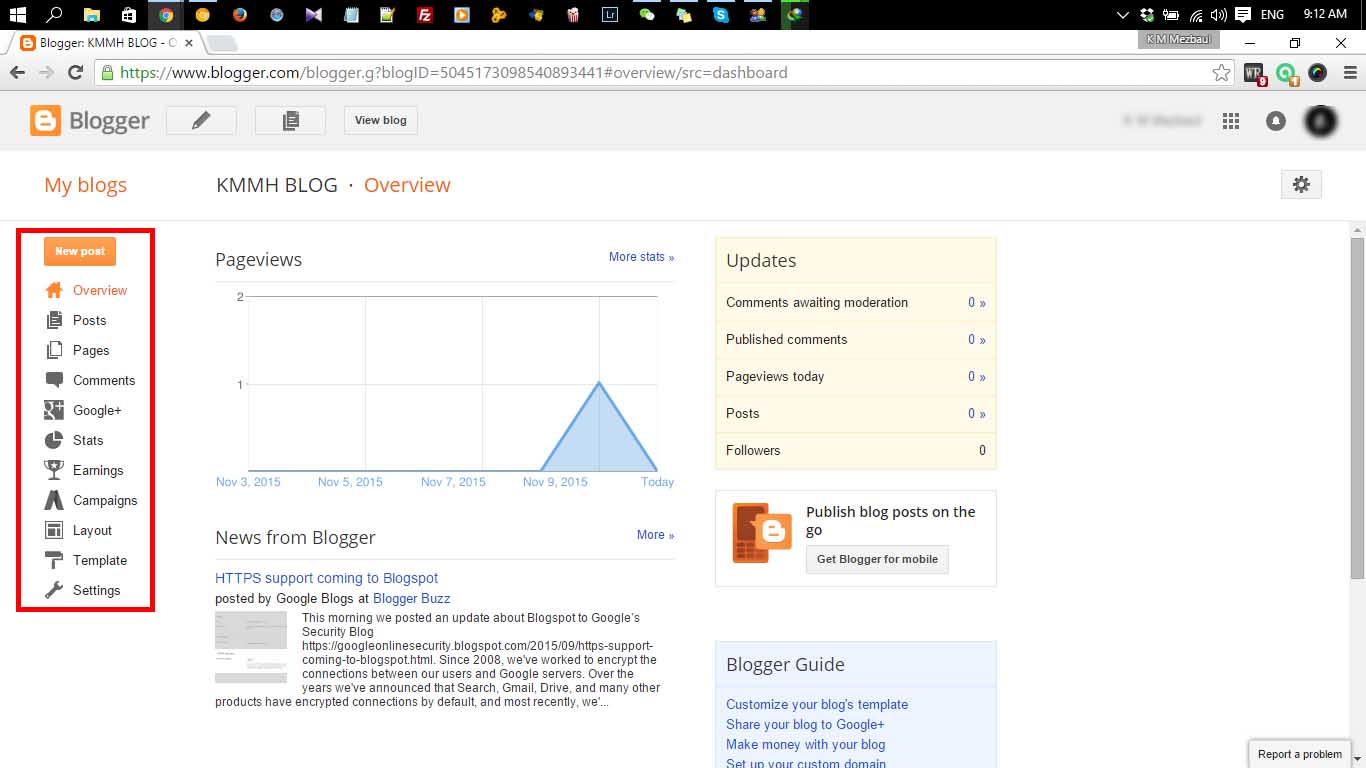
You may already have your domain name, if you are not then you can buy from KMMH IT DEVELOPERS. Now log in to your blogger account with your gmail. You will see the Dashboard page of google Blogger.

STEP - 2 (Creating a Blog)
On the dashboard click on "New Blog". A box will popup where you see a "Title" box for your blog name, a "Address" box for your blog url/address. Fill up the box and click on "Create Blog"


Now go to blog setting & try to save now. It will successfully save your top level domain.
Go to Setting>Basic>Blog Address & click "Edit" beside of your domain. Select "Redirect domain.com to www.domain.com".

Now your blog is ready. You can use default themes or buy premium themes from any other theme market. You can customise your blog from the left menu of your blog dashboard.
STEP - 3 (Add domain in Blogger)
Now we are going to setup a top level domain in blogger.
1. Go to "Setting"
2. Select "Basic"
3. Under "Blog Address" click on "+ Setup a 3rd party URL for your blog"
4. Give your top level domain in the box and click save. You will see a message ".We have not been able to verify your authority to this domain. Error 12" and alos CNAME information of your blog.

STEP - 4 (Add Blogger Name Server & CNAME)
Now login to your domain control panel.
1. Go to you domain's management panel.
2. Click "DNS Management" from right menu.
3. Under "DNS Management" you will see a message "Your DNS Management service is not configured correctly. Configure Now"
4. Click on "Configure Now", then it show you 2 list of name servers Your Current Name Servers & Our Name Servers.
5. Click the button "Fix Name Servers Automatically"
6. Now click on "Manage DNS"
7. Select "A Records" then "Add a Record"
8. Leave the "Host Name" blank & add the flowing IP in "Destination IPv4 Address" one by one.
216.239.32.21
216.239.34.21
216.239.36.21
216.239.38.21

9. Select "CNAME Records" then "Add CNAME Record"
10. In the "Host Name" field type "www" and "ghs.google.com" in "Value" field.
11. Now add the next CNAME same way.

All done. After adding all A Records & CNAMEs it will look like same as bellow.
 |
| A Records |
 |
| CNAME |
FINAL STEP
We are finished. Just a simple step, then you are able to visit your blog using your top level domain name.Go to Setting>Basic>Blog Address & click "Edit" beside of your domain. Select "Redirect domain.com to www.domain.com".
That it, now people can find your blog by the top level domain which you configured for your blog.
If you find this guide helpful, let me know. It will encourage me to help you guy's again.
Thank You.
Setup Resell.biz, Resellerclub, kmmh.net Domin in Blogger
10:56 PM
Tips & Tricks


